Groups
The Groups manager in concert with many of the other managers, provides the framework for relating content to people, sending targeted email, allowing visitors to personalize their experiences with your site and restricting content availability.
Who has access:
You must have one of the checked permissions to use this manager.
Guest
Member
Contributor
Editor
Administrator
Groups Coordinator

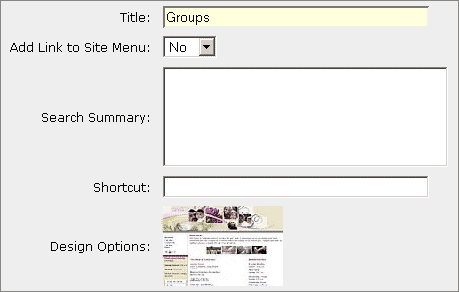
- TITLE: Enter a title for your Groups section. This title will appear on your main menu should you choose to display the link.
- ADD LINK TO SITE MENU: Select "Yes" from the drop down menu to display the link on your menu. Select "No" from the drop down menu to not display the link on your menu.
- SEARCH SUMMARY: Enter descriptive information to be used for Search Engine data and Site Search data.
- SHORTCUT: This allows you to make a shortcut to your Groups page. It will be a one word entry (i.e. groups). It can be accessed on the Web by typing in www.yourdomainname/shortcutname. (For example: www.yourdomain.com/groups).
- DESIGN OPTIONS: Click the design option that is currently shown. A window will appear with the other designs you made available in the Additional Designs section of your Designs manager. Select the design you want to apply to this page.
- Click the Save
 icon in the upper right corner of your screen to save your Groups manager settings.
- Add/Edit page contents using the Page Editor. For help with the functionality of the Page Editor, see Using the Editor for more information.
- Click the Save
 icon in the upper right corner of your screen to save your Groups manager page settings.
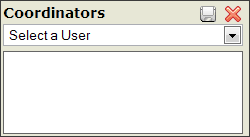 This feature is only applicable to those who have the People manager.
- Select an appropriate person from the drop down menu. The list of names that appear is populated from your People manager. The person must have an email address entered in your People manager in order to appear.
- Click the Save
 icon within the dialog box.
- Repeat steps 2 and 3 for each Coordinator you want to add.
- To delete a Coordinator, click the Delete
 icon to the left of the person's name.
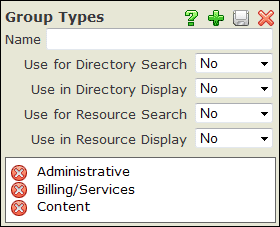 NAME: This is the name for the group type you are creating.
- USE FOR DIRECTORY SEARCH: This allows users to search for the groups associated with this group type on your Directory page. (This only applies to those who have the People manager.)
- USE IN DIRECTORY DISPLAY: This displays your groups associated with this group type on your Directory page. The user will be able to choose a group from a drop down list. (This only applies to those who have the People manager.)
- USE FOR RESOURCE SEARCH: This allows users to search for the groups associated with this group type on your Resources page. This also allows users to search for Events associated with your groups on your Events page.
- USE IN RESOURCE DISPLAY: This displays your groups associated with this group type on your Resources page. The user will be able to choose a group from a drop down list.
- Click the Save
 icon within the dialog box to save each Group Type.
- To make changes to the Group Type, click on the appropriate name, make your changes and click the Save
 icon in the upper right corner when you are finished.
- To delete a Group Type, click the Delete
 icon to the left of the name.
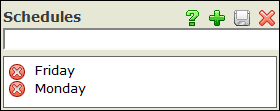
This box allows you to set up the various schedules that a group may meet.
- Type a schedule frequency such as "Monday" in the text field.
- Click the Save
 icon within the dialog box.
- Repeat this process until every schedule you need is listed.
- To delete a Schedule, click the Delete
 icon to the left of the Schedule name.
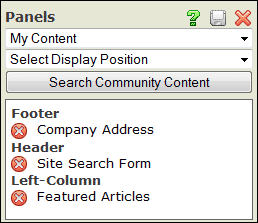 Add/Delete Panels
- Click the Panels tab.
- Using the first drop down menu, select the panel you wish to display.
- The panel you select will appear in the preview window at the bottom of the Panels dialog box.
- Using the second drop down menu, select the display position for the area you want the panel to appear on your site.
- Click the Save
 icon within the dialog box. Repeat this process for each panel you wish to add.
- To delete a panel placement, click the Delete
 icon to the left of the panel title.
Update Panel Position and Order
- Click the Panel Name
- Using the first drop down menu, select the display position for the area you want the panel to appear on your site.
- Using the second drop down menu, select the order in which you want the panel to display. By selecting "1", the panel will appear first within its assigned position. By selecting "2", the panel will appear second within its assigned position.
- Click the Save
 icon within the dialog box. Repeat this process for each panel you wish to update.
Search Community Content
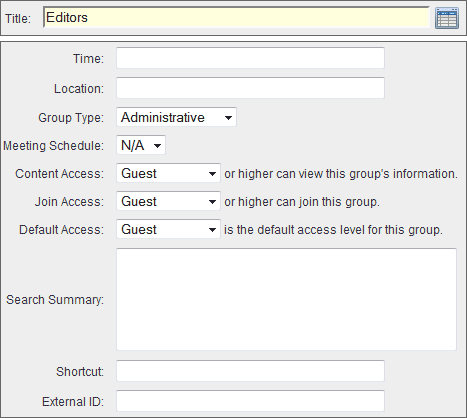
- Click the Add New Group
 icon.
icon.
- TITLE: Enter the name of this group. This field is highlighted in yellow because it is a required field.
- TIME: Enter the time this group meets (e.g. 9:30 a.m., 5:00-6:30 p.m.). You can use any format you wish. However, it is best to be consistent in the format. If you use a.m., be sure to use p.m., not pm or PM. Note: You must enter a time if you want the group type and group to appear on the Groups manager page.
- LOCATION: Enter the location where this group meets (e.g. Room 303, Board Room, etc.). Note: You must enter a location if you want the group type and group to appear on the Groups manager page.
- GROUP TYPE: Choose the category type from the drop-down menu for this group. These appear based on what you created in the Group Types section above.
- MEETING SCHEDULE: This is the frequency with which this group meets: weekly, monthly, etc. You must create the items in this drop-down menu by creating the list in the Schedules section above.
- CONTENT ACCESS: This allows you to set the minimum security level required to view your Group. For more information on setting access, see the People manager.
- JOIN ACCESS: This allows you to select the level of access a user will need to be able to add this group to his or her profile.
- DEFAULT ACCESS: This is the access level a person is automatically assigned when they add this group to their profile regardless of what their site-wide access is set to.
- SEARCH SUMMARY: Enter descriptive information to be used for Search Engine data and Site Search data.
- SHORTCUT: This allows you to make a shortcut to this group. It will be a one word entry (i.e. youth). It can be accessed on the Web by typing in www.yourdomainname/groups/shortcutname. (For example: www.yourdomain.com/groups/editors). Note: You must create a shortcut in the Manager Settings section of the Groups manager in order for the shortcut to a specific group to work.
- EXTERNAL ID: This field is used when exporting people from a database to tie the person to his or her group. This field is only used if you have the People manager.
Add/edit page contents using the Page Editor. For help with the functionality of the Page Editor, see
Using the Editor for more information. Click on the Save

icon in the upper right corner of your screen.
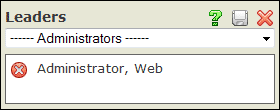 This tab will only show up if you have the People manager as the list is populated by those people contained within your People manager.
- Select a leader for the group by choosing a name from the drop down menu.
- Click the Save
 icon within the dialog box after each selection.
- The leader's name will appear on your website and will be associated with his or her corresponding group.
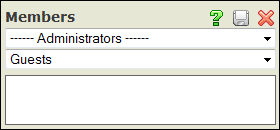 This tab will only show up if you have the People manager.
- Select a person you want to add to the group by choosing a name from the drop down menu.
- Select the security level you want the person to have for the group by choosing a security level from the second drop down menu. For information on security levels, see the People manager. This drop down menu will only appear if you have the Community Builder.
- Select the Save
 icon within the dialog box.
- To delete a group member, click the Delete
 icon to the left of the person's name.
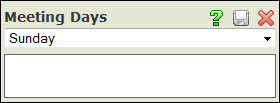 Choose the day(s) that this group meets. This is not the frequency but the day of the week. You can select none of the days, all of the days, or any combination between.
- Select from the drop-down menu.
- Click the Save
 icon within the dialog box.
- Repeat this process until every day for this group is listed. To delete a Meeting Day for this group, click the Delete
 icon to the left of the day.
- Delete a Group or Groups by selecting the check box to the left of the Group ID number.
- Click the Delete Selected
 icon. Once a Group is deleted, there is not a way to retrieve the Group.
- Alternatively, you may click the Delete
 icon within the Group itself.


 This box allows you to set up the various schedules that a group may meet.
 This feature is only applicable to those who have the
  NAME: This is the name for the group type you are creating.
 Add/Delete Panels
 This tab will only show up if you have the
  This tab will only show up if you have the
  Choose the day(s) that this group meets. This is not the frequency but the day of the week. You can select none of the days, all of the days, or any combination between.