Can I create something like this knowledge base on my site?
The knowledge base you are currently using to view this article was built entirely within our application.
We used the Resources and Groups managers to create a fully searchable, cross-referenced virtual library/custom database of information.
If you have a website package which contains both the Resources and Groups managers you can do the same thing by following these steps (p.s. similar steps are used for
categorizing your calendar):
- Open the Groups manager
- Click the Group Types tab
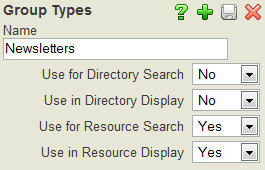
- Enter a title for your group type (i.e. Newsletters, Forms, etc.) then set the "Use for Resource Search" and "Use for Resource Display" values to "Yes"

The "Use for Resource Search" value causes the group type and any groups listed under it to appear in the "Filter by:" drop-down list on the main resources search page of your site. The "Use for Resource Display" value causes the group type and any groups listed under it to appear on the individual resource pages (the hyperlinked cross-reference).
- Click the small save button in the upper right corner of the Group Types window
- Continue adding additional groups types as necessary
- Exit the Group Types window
- Click the Schedules tab
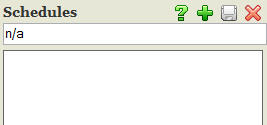
- Enter n/a and click the small save button in the upper right corner of the Schedules window (this is necessary to begin entering groups)

- Exit the Schedules window
- Click the Add New Group button

- Title the group according to the first category you want to make your resources searchable by (i.e. Youth, Women, Administrative, etc.)
- Choose the appropriate group type from the list you created in steps 3-5 above
- Since this is not a real group with meeting times, locations, etc. you do not need to worry with changing or setting any of the other values
- Save and Exit
- Repeat steps 10-14 for additional categories/departments
- Open the Resources manager
- Set up the appropriate options on the Manager Settings tab (set "Add Link to Site Menu" to "Yes" if you want it to be linked from your site menu)
- Save and exit to return to the main Resources screen
- Click Add New Resource

- Fill in the appropriate options for the resource
- Click the Personalization tab (this appears after saving for the first time)
- Select the appropriate group from the drop-down list
- Click the small save button in the upper right corner of the Personalization window
- Exit the Personalization window
- Save and Exit
- Repeat steps 19-25 for additional resources
Previous Page

